Published by AMTEC on 01st Jun 2021
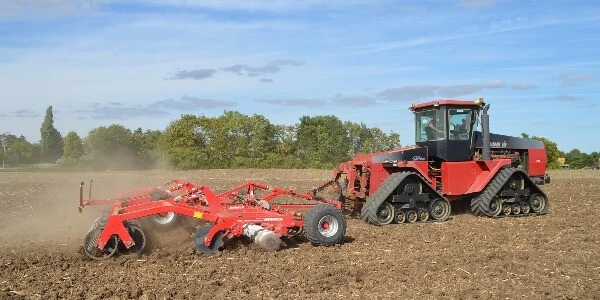
Following the popularity of our original guide to ploughing, we’ve put together more tips for setting up and using a plough, including troubleshooting for common ploughing issues.

Following the popularity of our original guide to ploughing, we’ve put together more tips for setting up and using a plough, including troubleshooting for common ploughing issues. Whether you’re using a Lemken plough, Kverneland, or another top-brand plough, this guide can help you get the most out of your season.
Correct setting up a plough is essential, as with any other agricultural machinery and equipment , as better results will be achieved.
To achieve good results when ploughing, it is essential to set the mouldboards up correctly; this will ensure that all the furrows are equal when ploughing.
Mark the mouldboard – to set the mouldboards up correctly, a common ‘datum’ point must be marked on each board. The easiest way to do this is to measure from the joint where the mouldboard, shin and share meet (see diagram)
Adjusting the right-hand mouldboards – loosen the stay on the centre mouldboard so that it is in a neutral position; this then becomes the master board to set the others from. Measure between the datum points marked in each mouldboard, the measurement of the outlet should be the same as the inlet interbody clearance. Adjust the bodies, so they are parallel.
Transfer the right hand ‘throw’ to the left-hand side – both bodies must be equal. To do this, measure the distance from the datum point on the master furrow to the leg on the body behind (as per diagram). Turn the plough over and transfer this measurement to the master furrow on the left side.
Adjusting the left-hand mouldboards – with the clearance set on the master furrow, now repeat step 2 on the left-hand side.
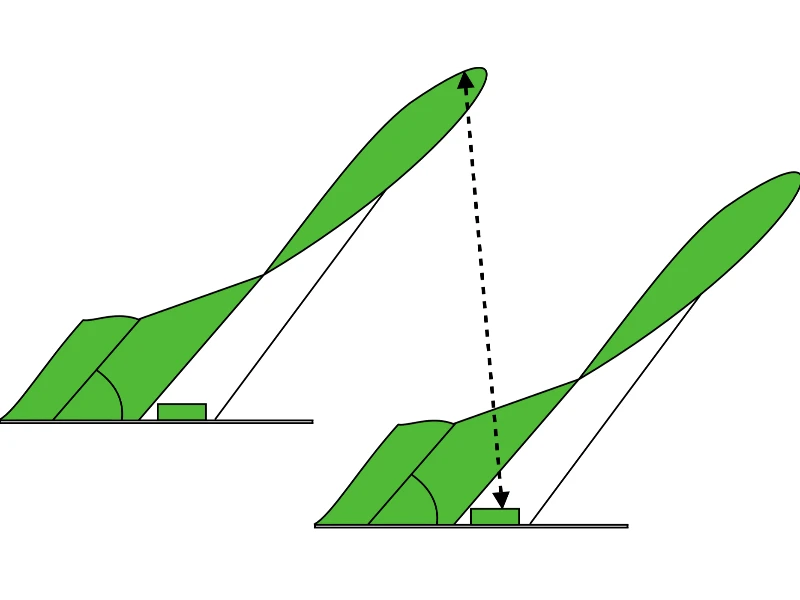
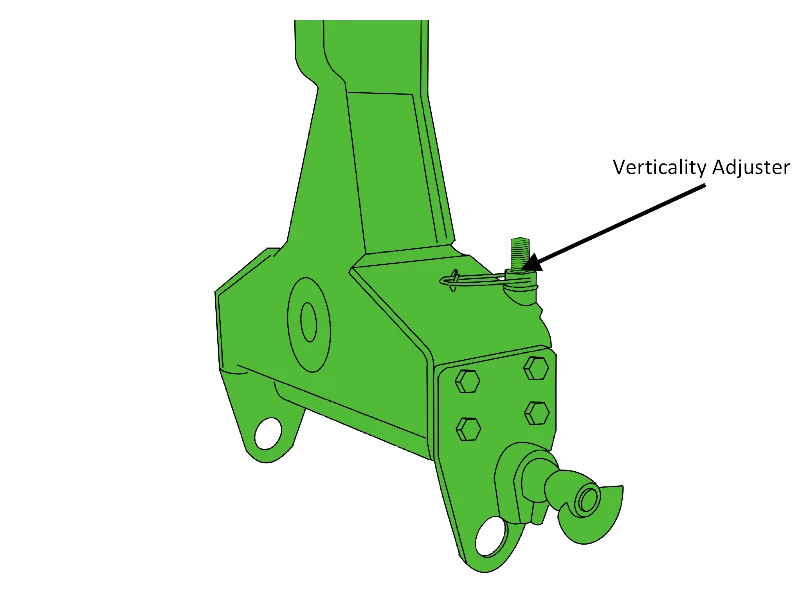
For successful ploughing, the plough must be operating upright in both ploughing directions. An independent screw carries out the adjustment on either side of the headstock (see diagram).
Once the plough is upright, then the front furrow width can be adjusted. This is carried out initially with the front and rear inside wheel settings on the tractor but can also be adjusted by moving the plough to the right or left by:
The second option is by far the best as it allows the plough to still pull in a straight line. Using option 1 can induce pressure, causing the tractor to crab and produce excessive wear on the plough parts. When adjusting the front furrow, it is important to remember that the plough and tractor should work inline at all times, with the top link running straight behind the tractor.

Problem |
Cause |
Solution |
Poor penetration |
1. Worn metal |
1. Fit new shares and points |
|
|
2. Plough leaning into work |
2. Adjust plough verticality studs so plough is 90 deg to the ground |
|
|
3. Top link too long |
3. Shorten top link |
Tractor difficult to steer |
1. Tractor front too light |
1. Add front weights |
|
|
2. Bodies out of line |
2. Check plough alignment |
|
|
3. Tractor stabilisers too tight |
3. Adjust so the plough can float freely |
|
|
4. Tractor wheel settings incorrect |
4. Check tractor operators manual to adjust |
Narrow/ wide front furrow |
1. Tractor wheel settings incorrect |
1. Check tractor operators manual to adjust |
|
|
2. Tractor stabilisers too tight |
2. Adjust so the plough can float freely |
|
|
3. Damaged components |
3. Check plough alignment and change parts if necessary |
Uneven furrows |
1. Incorrect interbody settings |
1. Check mouldboard position |
|
|
2. Skims inconsistent |
2. Adjust so all skims are set to the same depth and position |
|
|
3. Mouldboard heights |
3. Adjust mouldboard height and spacing |
|
|
4. Incorrect front furrow depth/width |
4. Ensure width and depth is equal on all bodies |
|
|
5. Damaged leg or shear bolt |
5. Check alignment and shear bolts |
Furrows rolling back |
1. Furrows too deep for the width of ploughing |
1. Reduce depth or increase furrow width |
|
|
2. Top link too short |
2. Lengthen top link |
|
|
3. Mouldboards adjusted too far back |
3. Adjust mouldboards to correct position |
Trash not being buried |
1. Skim coulters set incorrectly |
1. Adjust skims to correct working depth and position |
|
|
2. Ploughing too fast for skimmers |
2. Slow forward speed to allow skimmed soil to be buried |
Front furrow low orsecond furrow too high |
1. Tractor tyres too wide for furrow width |
1. Narrow the front furrow width so that it is supported by the last furrow of the previous run |
|
|
2. Front furrow with too wide |
2. Adjust the width of the front furrow |

Learn the seven key lessons successful farm managers use to build resilient farming businesses, from people and culture to technology, communication and long-term planning.
Jason White
16th Jun 2026
Read More
Precision farming and modern machinery improve efficiency, but long-term agricultural success still depends on good operators, strong teams, and practical management.
Jason White
18th May 2026
Read More
Using cover crops as part of your sustainable farming journey.
AMTEC
01st May 2026
Read More